Key takeaways
- Unplug the tray and let it cool before cleaning.
- Wipe spills with a soft, damp cloth; do not pour water over the surface.
- Use a mild detergent for grease and dry the unit before storage.
- Avoid abrasive pads, metal utensils, and oven cleaner.
- Do not cover ventilation openings or place towels beneath the control housing.
- Inspect the cord before each use and stop using the unit if the insulation is cracked or the plug becomes unusually hot.
Best Electric Warming Plates for the Table
The best electric warming plate for table use is usually a thermostatically controlled, 21- to 24-inch glass or metal surface with adjustable heat, a side-mounted cord, and enough clearance for the dishes you actually serve. For most families, a low-profile countertop warming tray is the most useful choice; buffet hosts may prefer a larger rectangular model, while occasional users can save money with a compact single-zone plate.
Quick picks by situation
| Situation | Best type | Useful target specification | Typical price range |
|---|---|---|---|
| Family dinner for four to six | Large single-zone warming tray | 21–24 inches wide, 200–300 watts, adjustable thermostat | $45–$90 |
| Frequent buffet hosting | Extra-wide rectangular electric tray | 24–30 inches wide, 300–500 watts, divided controls or even heating | $80–$160 |
| Small kitchen or apartment | Compact warming plate | 12–16 inches wide, 100–200 watts, upright storage | $25–$60 |
| Serving one dish or a gravy boat | Single-zone hot plate-style warmer | 8–12 inches, 80–180 watts, low and medium settings | $20–$50 |
| Events without a nearby outlet | Insulated non-electric server | No electrical heating; relies on insulation or hot water | $20–$80 |
What matters most when choosing a table warming plate
Surface size and usable coverage
Manufacturers often quote the outside dimensions, but the usable heated area can be smaller because of the control housing, handles, trim, or unheated edges. Measure the bottoms of your serving dishes rather than their rims. A 9-inch casserole, a 10-inch serving bowl, and a 12-inch platter may need around 250 square inches of practical space once gaps between dishes are included.
Our top picks
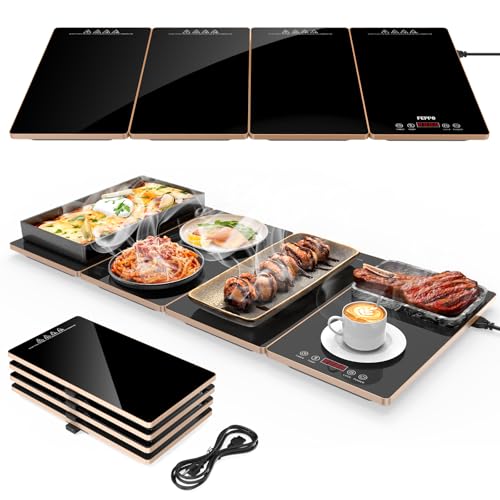

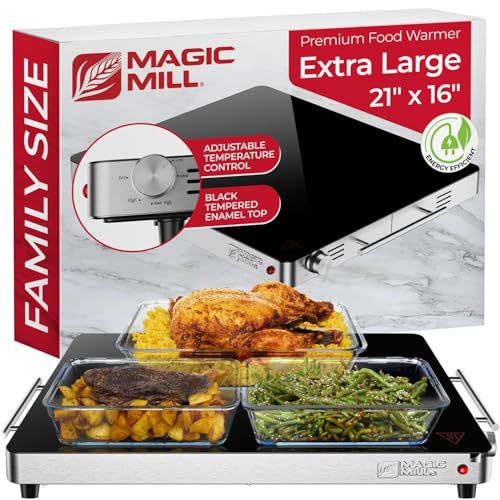

As an Amazon Associate we earn from qualifying purchases at no extra cost to you. Ratings are shown as listed on Amazon.
As a rough calculation, a 22-by-12-inch heated surface provides 264 square inches of nominal area. If you reserve 1 inch around the perimeter and leave 1 inch between two rows of dishes, the practical arrangement may be closer to two medium casserole dishes or three smaller serving bowls—not a full collection of large platters.
For a family table, a long rectangular tray is often more useful than a round plate because it fits multiple dishes in a line and can sit behind dinner plates. A round unit suits one central casserole but may waste space when placed against a wall or at the end of a table.
Temperature control, not just “keep warm”
Look for a real dial or digital control with at least low, medium, and high settings. Better models state an approximate temperature range, often around 140°F to 200°F, although surface temperatures vary by load, cookware, and room conditions.
A warming plate is designed to maintain already-hot food, not rapidly cook raw food. Low settings are appropriate for bread, pastries, and delicate serving dishes. Medium is generally more useful for casseroles and covered vegetables. High can help recover heat after adding a cold dish, but prolonged high heat may dry food, overheat a serving dish, or make an exposed surface unsafe to touch.
Independent zones are valuable when one dish needs more heat than another. However, two controls do not always mean two fully independent heating elements; check whether the manufacturer specifies separate zones and their individual wattage.
Heat-up time and heat recovery
Most plug-in warming trays need roughly 8 to 20 minutes to become useful, depending on wattage and construction. Glass and thick metal surfaces may take longer to warm evenly than a thin metal plate, but they can distribute heat more consistently once hot.
Heat-up time matters less than recovery time. A tray may feel hot when empty but lose substantial heat when a cold ceramic dish is placed on it. For dependable buffet service, preheat the unit for 15 to 20 minutes, use room-temperature or already-warm cookware where possible, and cover food when practical. A 300-watt tray has more reserve than a 150-watt model, but it may also draw more electricity and become hotter around exposed areas.
Cord placement and table safety
A side-mounted cord is usually preferable to a cord exiting from the center or underside because it reduces the chance of the cable passing beneath a dish. Look for a cord at least 4 to 6 feet long, strain relief where it enters the unit, and a plug that can reach an outlet without crossing a walkway.
Before setting up, identify the nearest outlet and arrange the tray so the cord runs along the back edge of the table. Do not place the cable where guests will pull it while serving. Keep the control and plug away from spills, use a grounded outlet when specified, and avoid plugging a high-wattage tray into an overloaded extension cord or power strip.
Non-slip feet, insulated handles, a cool-touch control area, and overheat protection are worthwhile features. A surface marked “hot” after use is helpful, but it is not a substitute for keeping children away from the unit and allowing it to cool completely before moving it.
Cookware compatibility
Check the instructions before using glass, ceramic, stoneware, aluminum, stainless steel, or disposable serving pans. Many electric warming trays accept heat-safe cookware, but not every dish is suitable for direct contact with a heated surface. Sudden temperature changes can crack some glass or ceramic dishes.
Flat-bottomed dishes transfer heat more reliably than bowls with narrow feet or heavily textured bases. Very thick stoneware may insulate food from the plate, while thin disposable aluminum pans can become hot quickly and may scratch some surfaces. Do not use plastic containers unless the manufacturer specifically approves them for the operating temperature.
Never put a warming tray in an oven, under a broiler, or in a dishwasher unless its instructions explicitly allow it. The electrical components and control housing must stay dry.
Head-to-head: the main warming-plate designs
Glass-top warming trays
Glass surfaces look polished on a dining table and are relatively easy to wipe clean. They often provide a broad, uninterrupted area for dishes. Their drawbacks are weight, possible breakage from impact or thermal shock, and slower apparent heat-up. Choose one with sturdy edge protection and clear warnings about cookware.
Metal warming trays
Metal models are usually lighter, less fragile, and often less expensive. They can respond quickly to temperature changes, but thin metal may create hotter zones or show scratches. A brushed or coated surface can hide everyday marks better than polished metal.
Hot plate-style single zones
These compact units are convenient for a gravy boat, saucepan, or one small casserole. They take little storage space and may cost less, but their circular heating area limits dish size. They are better for targeted serving than for a complete buffet.
Ownership realities: cleaning, wear, and common mistakes
The first parts likely to show wear are the power cord, control dial, non-slip feet, and surface coating. Repeatedly wrapping the cord tightly around the unit can damage the cable near the plug or strain relief. Store the tray with the cord loosely coiled, not sharply bent.
- Unplug the tray and let it cool before cleaning.
- Wipe spills with a soft, damp cloth; do not pour water over the surface.
- Use a mild detergent for grease and dry the unit before storage.
- Avoid abrasive pads, metal utensils, and oven cleaner.
- Do not cover ventilation openings or place towels beneath the control housing.
- Inspect the cord before each use and stop using the unit if the insulation is cracked or the plug becomes unusually hot.
A common mistake is treating a warming tray as a substitute for a food-safe holding system. Keep food hot according to applicable local food-safety guidance, use covered dishes when possible, and monitor food rather than assuming the dial setting guarantees a particular temperature in every situation.
How to set up a warming plate for a buffet
- Measure the serving dishes. Confirm that their bases fit entirely within the heated area without covering the control panel.
- Choose a stable location. Set the tray on a dry, level, heat-resistant surface with clearance around the controls and cord.
- Preheat before serving. Allow about 15 minutes, or follow the manufacturer’s stated warm-up period.
- Load hot, covered dishes. Place the thickest or largest dish over the warmest central area and use lower settings for bread or delicate foods.
- Recheck after loading. If the surface cools noticeably, allow recovery time rather than immediately turning the control to maximum.
- Shut down safely. Switch off, unplug, and leave the unit untouched until fully cool before cleaning or storing.
Bottom line
For most households, choose a 21- to 24-inch electric warming tray with adjustable temperature control, at least 200 watts, a side-exiting cord, non-slip feet, and compatibility with your preferred serving dishes. Spend more on a larger surface, independent zones, and stronger construction only if you host often. If your table has limited outlet access or you need to hold food for a long event, an insulated non-electric server may be more practical than a larger electric plate.