Key takeaways
- Water pumps and inlet valves: Mineral deposits can restrict flow, especially with hard water. A suitable filter and regular descaling help.
- Drain hoses: Kinks, algae, and poorly supported hoses can cause overflow or standing water.
- Ice-making surfaces: Scale buildup reduces heat transfer and can produce cloudy or oddly shaped ice.
- Augers and moving parts: Nugget machines need particular attention because the auger works continuously during dispensing and storage cycles.
- Cabinet finish: Chlorine, salt air, and abrasive cleaners can stain stainless steel. Rinse outdoor surfaces and use a non-abrasive cleaner.
- Door and lid seals: Damaged seals let warm air and insects into the storage area, increasing melt and contamination risk.
The best outdoor ice makers are weather-rated built-in units for permanent patios, while portable countertop machines are better for covered RV use, tailgates, and occasional entertaining.
Outdoor ice makers are not interchangeable with indoor countertop appliances. Sun, humidity, dust, rain, unstable power, limited water access, and poor drainage can shorten the life of a machine that was never designed for exterior installation. The right choice depends less on the largest advertised daily output than on where the unit will sit, how often you need ice, and whether you can provide water and drainage.
Our top picks



As an Amazon Associate we earn from qualifying purchases at no extra cost to you. Ratings are shown as listed on Amazon.
Best outdoor ice makers by situation
| Situation | Best type | Useful target specifications | Why it fits |
|---|---|---|---|
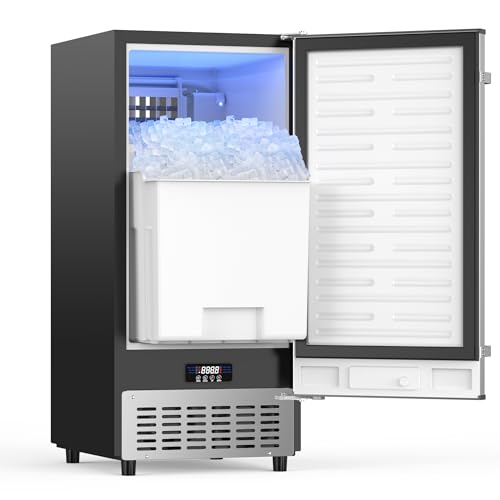
| Permanent covered patio or outdoor kitchen | Weather-rated built-in ice maker | 50–80 lb daily production, 25–30 lb storage, stainless exterior, drain connection | Reliable high-volume service without repeatedly filling a reservoir |
| RV trips and occasional gatherings | Portable countertop ice maker | 26–35 lb daily production, 1.5–3 qt reservoir, 20–35 lb weight | Easy to move and usually compatible with a standard 120-volt outlet |
| Large parties or frequent entertaining | High-output portable or under-counter unit | 40–80 lb daily production, 2.5–5 lb batch output, continuous drain | Reduces waiting between batches and limits trips to the freezer |
| Boondocking or unreliable shore power | Small portable machine used selectively | 300–500 watts while running, low water demand, manual refill | More practical with an inverter or generator than a plumbed outdoor model |
What makes an ice maker suitable for outdoor use?
Weather resistance
A genuine outdoor unit should be explicitly rated or listed by its manufacturer for outdoor installation. Look for corrosion-resistant stainless steel, protected controls, weather-sealed construction, adequate ventilation, and an operating-temperature range that covers your climate. “Stainless steel” alone does not make a machine weatherproof.
Even an outdoor-rated ice maker generally needs a roof or other overhead protection. Direct rain can enter vents, while full sun can raise the cabinet temperature and increase compressor workload. Avoid placing any machine where sprinklers, salt spray, blowing sand, or standing water can reach it.
Portable countertop machines are a different category. Models such as the GE Profile Opal 2.0 Ultra and NewAir portable countertop ice makers are designed for indoor or sheltered use, not exposure to rain. They can be useful on an RV counter, inside a screened porch, or beneath a dry patio roof, but they should be brought indoors after use.
Ice style and production rate
Choose the ice shape based on use rather than marketing language. Nugget ice is soft and chewable, but it usually requires a more complex auger and melting-water system. Bullet-shaped ice is common in portable machines and is produced quickly, although it may melt faster in a cooler. Clear gourmet cubes are dense and attractive for drinks but commonly require a larger, slower built-in machine.
Daily production figures are measured under specific conditions and are not the same as the amount available at one moment. Heat, poor ventilation, warm incoming water, and frequent lid opening reduce output. For a patio bar serving four to six people, 25–40 pounds per day is usually adequate. A larger gathering or commercial-style drink service may justify 50–80 pounds per day.
Head-to-head: portable versus built-in outdoor ice makers
| Feature | Portable countertop type | Outdoor built-in type |
|---|---|---|
| Typical production | 26–40 lb per 24 hours | 50–80 lb per 24 hours |
| Ice storage | 1.5–3 lb insulated bin | 20–30 lb insulated storage bin |
| Typical footprint | 9–15 in. wide; 12–18 in. deep | 14–24 in. wide; 24–26 in. deep |
| Typical weight | 20–35 lb | 80–150 lb |
| Water supply | Manual reservoir refill | Usually a 1/4-inch water line, depending on model |
| Drainage | Manual drain plug or small outlet | Gravity drain or drain pump installation |
| Power | Usually 120 V; approximately 100–500 W while operating | Usually dedicated 120 V circuit; compressor startup needs more than running wattage |
| Outdoor suitability | Sheltered use only unless specifically rated | Designed for approved outdoor locations, still usually requiring cover |
Water hookup, drainage, and power considerations
A countertop machine is simplest when you have no plumbing. Fill the reservoir with potable water, start a cycle, and empty the meltwater when necessary. This works well in an RV, but it creates a repetitive task: a machine producing 30 pounds of ice may need several reservoir refills because the water used to make ice is not all held in the finished cubes.
A plumbed machine is more convenient, but the installation must include a shutoff valve, an accessible water filter if recommended, and a drain route. Ice melts inside the storage bin, so “self-contained” does not mean “no drain.” A gravity drain needs a continuously descending path. If the drain must rise to reach a household or RV drain, you may need a compatible pump. Do not improvise with a narrow hose that can kink or back up.
Power is another common mistake. A machine labeled 300 watts may draw substantially more during compressor startup. Use a grounded outlet and follow the manufacturer’s circuit requirements. On an RV inverter, estimate runtime conservatively. For example, a 300-watt machine running for six hours consumes 1.8 kilowatt-hours before inverter losses. A 2,000-watt-hour battery may therefore provide only about one full operating session after allowing for conversion losses and other RV loads.
How much ice do you actually need?
Use this practical calculation: people served × drinks per person × ice per drink. If eight guests each have four drinks and each drink uses six ounces of ice, the requirement is 192 ounces, or 12 pounds. Add 25–50 percent for cooler loading, melting, and refills, producing a target of roughly 15–18 pounds.
That amount does not require an 80-pound commercial-style machine if you can begin production several hours before the event. However, a small portable bin may hold only 1–3 pounds at once. You would need to transfer ice to a cooler or insulated container as the bin fills. Storage capacity matters as much as daily production.
Ownership realities: what wears first?
- Water pumps and inlet valves: Mineral deposits can restrict flow, especially with hard water. A suitable filter and regular descaling help.
- Drain hoses: Kinks, algae, and poorly supported hoses can cause overflow or standing water.
- Ice-making surfaces: Scale buildup reduces heat transfer and can produce cloudy or oddly shaped ice.
- Augers and moving parts: Nugget machines need particular attention because the auger works continuously during dispensing and storage cycles.
- Cabinet finish: Chlorine, salt air, and abrasive cleaners can stain stainless steel. Rinse outdoor surfaces and use a non-abrasive cleaner.
- Door and lid seals: Damaged seals let warm air and insects into the storage area, increasing melt and contamination risk.
Clean the water system according to the manual rather than relying on an occasional rinse. A typical maintenance routine includes draining old water, running the approved cleaning or descaling solution, rinsing several times with fresh water, wiping the bin, and sanitizing food-contact surfaces when directed. Never leave stagnant water inside a portable machine between trips.
Installation and placement checklist
- Measure the opening, including rear clearance for hoses and the top or side clearance required for ventilation.
- Confirm that the floor can support the appliance, especially when a built-in bin is full of ice.
- Place the unit under cover, away from direct sun and splash zones.
- Install the water shutoff and filter before connecting the supply line.
- Test the drain with several cups of water before making ice.
- Allow the machine to stand upright for the period specified after transport so compressor oil can settle.
- Make one or two initial batches and discard them if the manual recommends a flushing cycle.
Bottom line
For a permanent outdoor kitchen, choose a weather-rated built-in ice maker with at least 50 pounds of daily production, 20 pounds of storage, a dependable drain, and a plumbed water supply. For an RV or occasional patio use, choose a portable countertop model with a 26–40-pound daily rating, a removable reservoir, manageable weight, and a manual drain. If you expect to run it from batteries, calculate watt-hours before buying; if you expect rain or winter exposure, buy for an approved outdoor installation rather than treating a portable appliance as weatherproof.